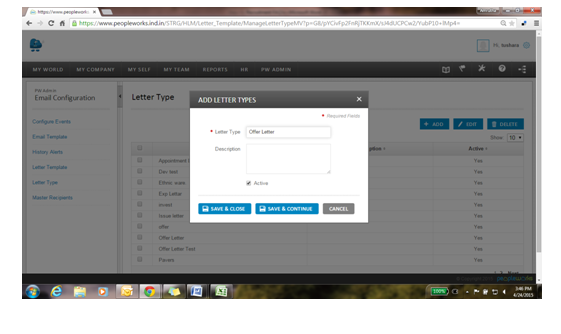
How to configure Offer Letter/Letter Type?
Below are the steps to create a Letter Type,
Navigate through PW>>See all>>Email Configuration>>Letter Type.
Click on ‘ADD’ button to add a new letter type.
Enter the letter name and click on ‘Save & Close’ button.
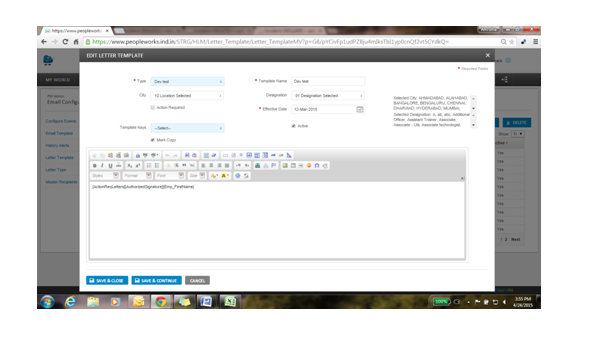
How to create Letter Template?
Below are the steps to create Letter Template,
Navigate through PW Admin>>See All>>Email Configuration>>Letter Template.
Click on ‘ADD’ button and add all the mandatory fields.
Click on ‘Save & Close’ button.
Non mandatory fields like ‘City’ and ‘Designation should be selected, if either of fields is not selected then the letter template cannot be triggered.
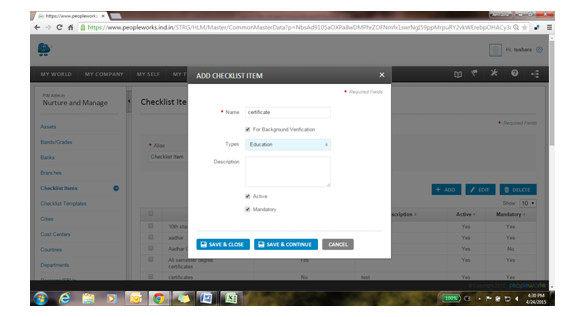
Below are the steps to add Check List items,
Navigate through PW Admin>>See All>>Nurture and Manage>>Checklist Items.
Click on ‘ADD’ button and add new document.
‘Check’ the ‘For background Verification’ check box, if needed.
Select the ‘Type’ of verification, if background verification is checked.
Check the ‘Mandatory’ checkbox if submission of this document is mandatory.
Click on ‘Save & Close’ button.
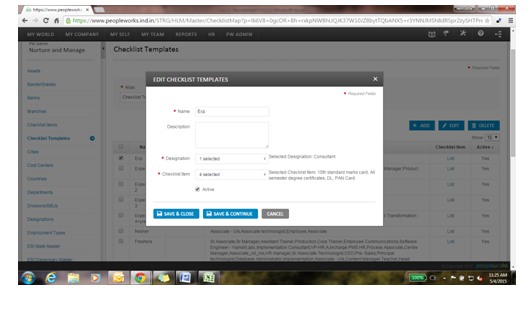
How to add Checklist Template?
Below are the steps to add Checklist Template,
Navigate through PW Admin>>See All>>Nurture and Manage>>Checklist Template.
Here we can group the list of checklist items under one name called ‘Template’.
To add a ‘Template’, click on ADD button and fill the mandatory fields and click on ‘SAVE & CLOSE’ button.
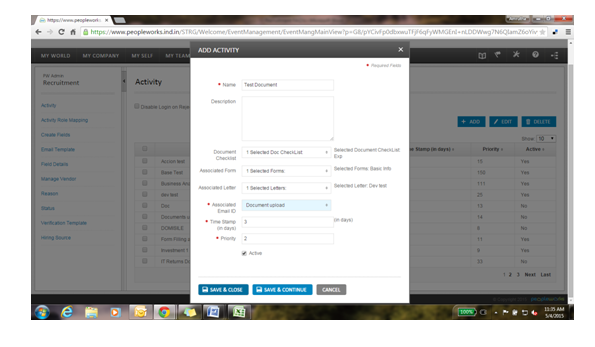
Below are the steps to create a new Activity,
Navigate through PW Admin>>See All>>Recruitment>>Activity.
Click on ‘ADD’ button, fill all the mandatory and non- mandatory fields like ‘Document Checklist’, ‘Associated Form’ and ‘Associated Letter’ since this is needed when we try to map the documents. Click on ‘SAVE & CLOSE’ button.
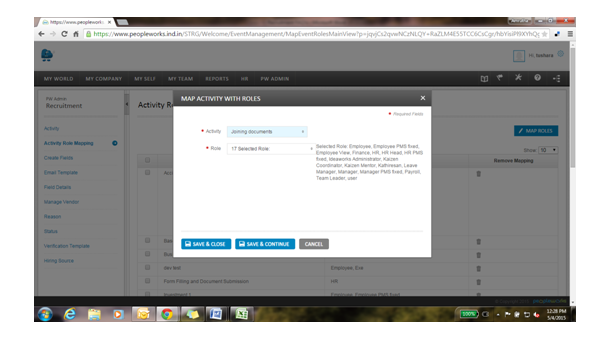
Below are the steps to map an Activity,
Navigate through PW Admin>>See All>>Recruitment>>Activity Role Mapping.
Select the activity by checking the respective checkbox and click on ‘Map Roles’.
Select the required role which is to be mapped with that activity and click on ‘SAVE & CLOSE’ button.
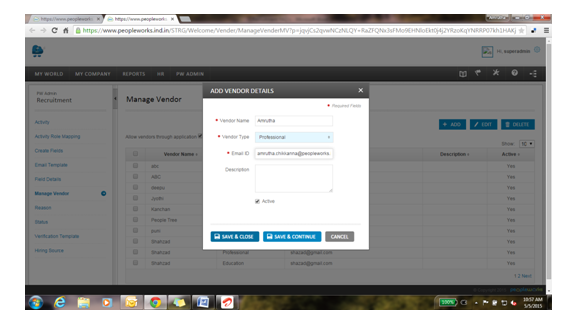
Below are the steps to add vendor:
Navigate through PW Admin>>See All>>Recruitment>>Manage Vendor.
Click on ‘ADD’ button and fill all the fields and click on ‘SAVE & CLOSE’ button.
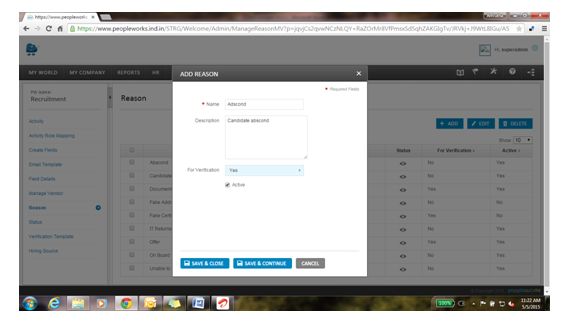
How to add reason for candidate removal?
Below are the steps to add reason:
Navigate through PW Admin>>See All>>Recruitment>>Reason.
Click on ‘ADD’ button and fill all the necessary fields.
Click on ‘SAVE & CLOSE’ button.
How to add Recruitment Status?
Below are the steps to add status:
Navigate through PW Admin>>See All>>Recruitment>>Status.
Click on ‘ADD’ button, fill all the fields and click on ‘SAVE & CLOSE’ button.

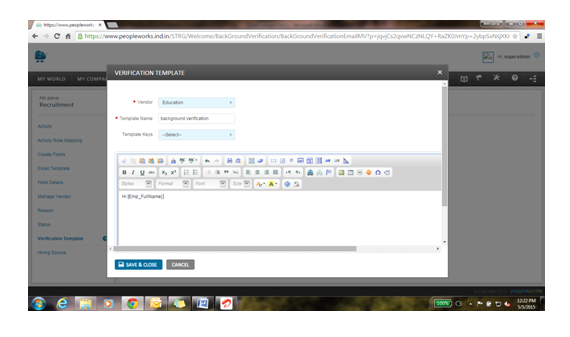
How to edit Background Verification Template?
Below are the steps to edit verification template:
Navigate through PW Admin>>See All>>Recruitment>>Verification Template.
Click on ‘BACKGROUND VERIFICATION TEMPLATE’.
Select the vendor based on verification need to be done such as ‘Education’, ‘Generic’, ’Personal’ or ‘Professional’.
‘Template Name’ pops up automatically.
Add the required ‘Template Keys’ and create the template.
Click on ‘SAVE & CLOSE’.
Below are the steps to add hiring sources:
Navigate through PW Admin>>See All>>Recruitment>>Hiring Source.
Click on ‘ADD’ button, enter the name of the source required (like Employee reference/Job portal/Walk-in etc).
